Step 01
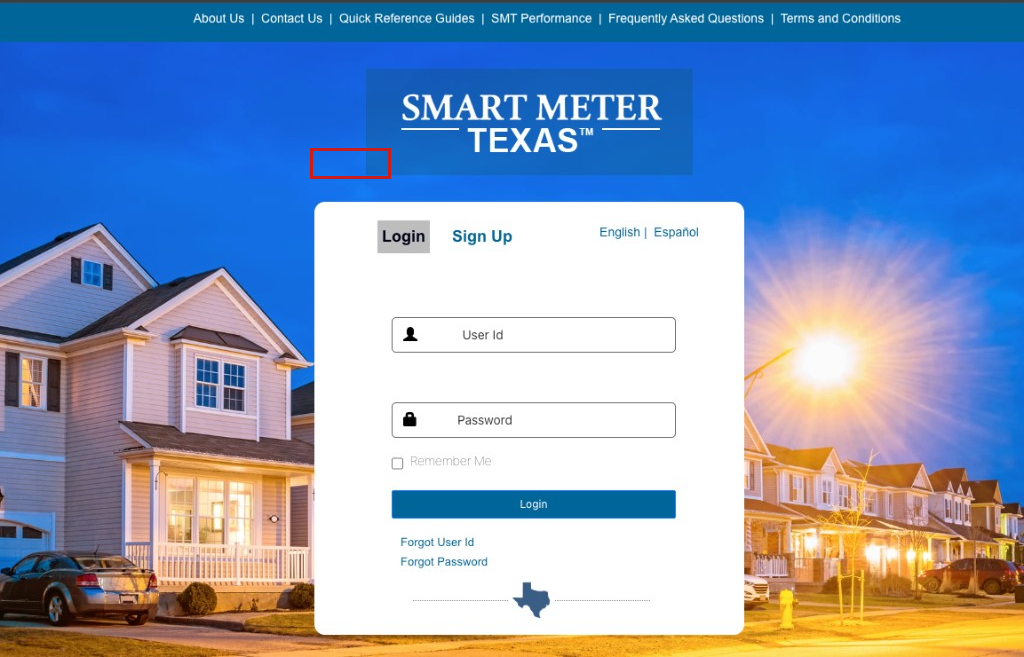
Open smartmetertexas.com
This is the state's meter portal, not your electricity company — and it's free. Click Sign Up if you don't have an account yet.
Guide
You create the account. MeterTruth never asks for your password. When the CSV lands, upload it on the usage step— parsing happens in your browser.
This is the state's meter portal, not your electricity company — and it's free. Click Sign Up if you don't have an account yet.
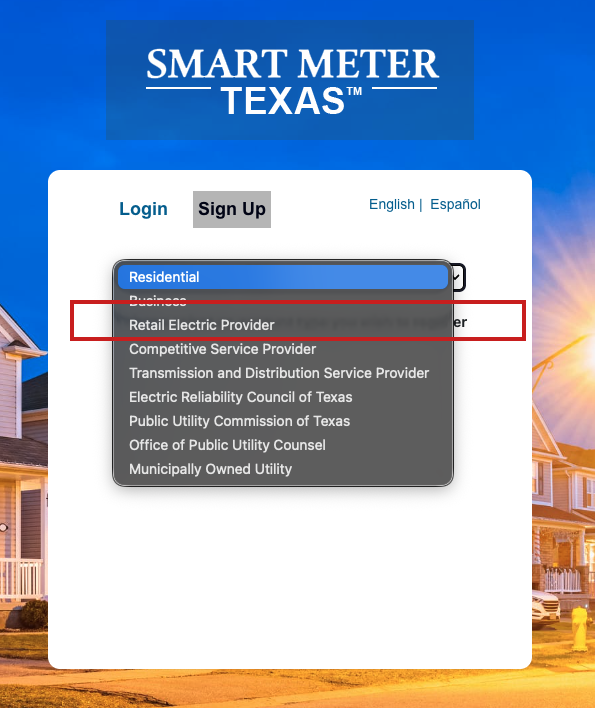
When it asks for account type, pick Residential. The other options are for utilities and companies — not for a household.
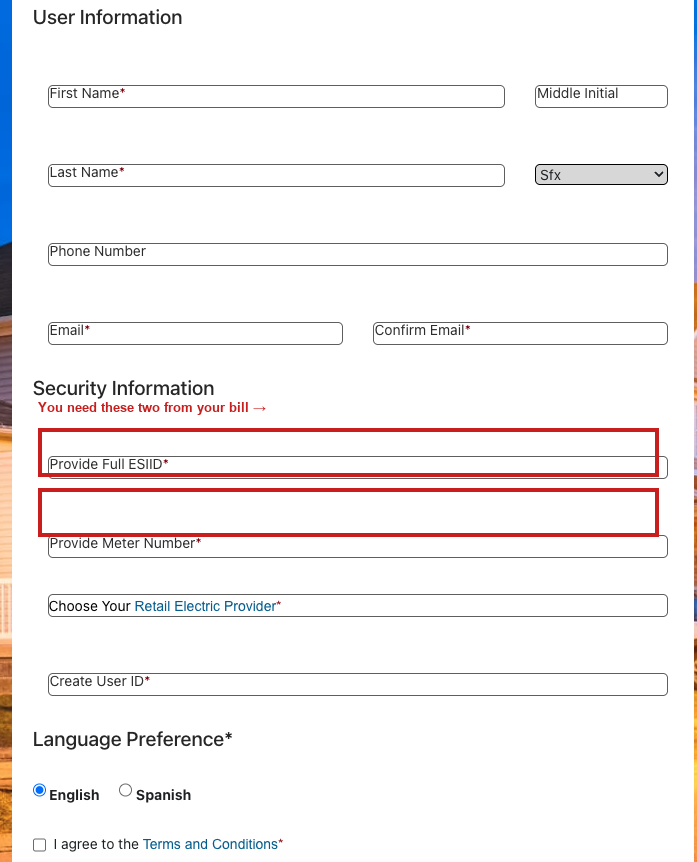
Both are on your electricity bill. The ESIID (say "easy-ID") is a 17-digit meter account number for your address. You'll also pick your current electricity company and create a user ID.
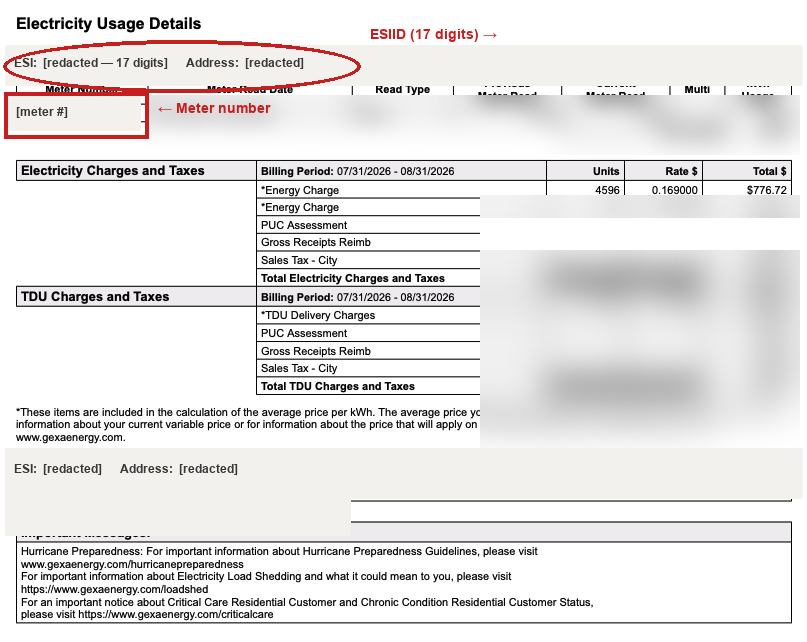
On most bills they sit in the usage section: ESI or ESIID is the 17-digit number, and Meter Number is in the meter-reading table. Circled here on a redacted bill.
They email a verification link first; it can take a few minutes. Once you're on the dashboard, the export lives right here. Four clicks, numbered on the screenshot.
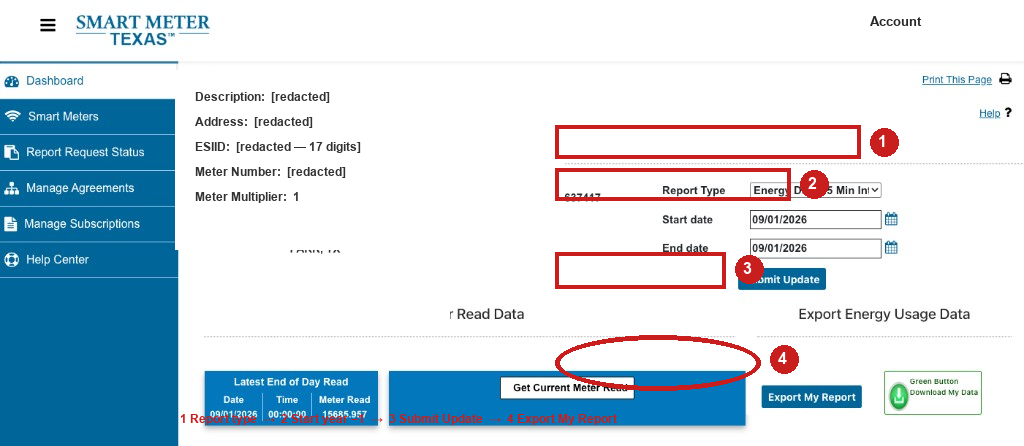
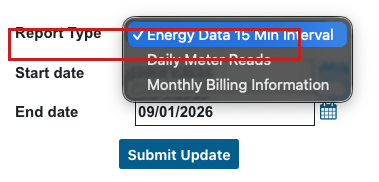
That exact option. Daily or monthly summaries will not give MeterTruth the detailed file it needs to price free-nights plans fairly.
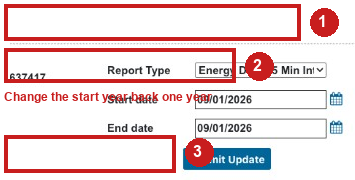
Leave the end date as today. Manually change the start date's year to one year earlier, then click Submit Update. If the portal caps the range, pull it in chunks — multiple CSVs are fine.
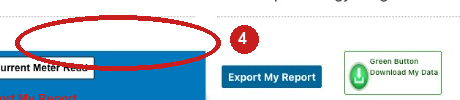
That downloads the CSV. Bring that file back to the MeterTruth usage step — it never leaves your computer; only the monthly totals are sent to price plans.
Type twelve monthly kWh totals from your bills or your electricity company's usage history on the audit usage step. You will not get fair pricing on free-nights plans without the detailed meter file, but regular fixed-rate plans still rank on your real months.